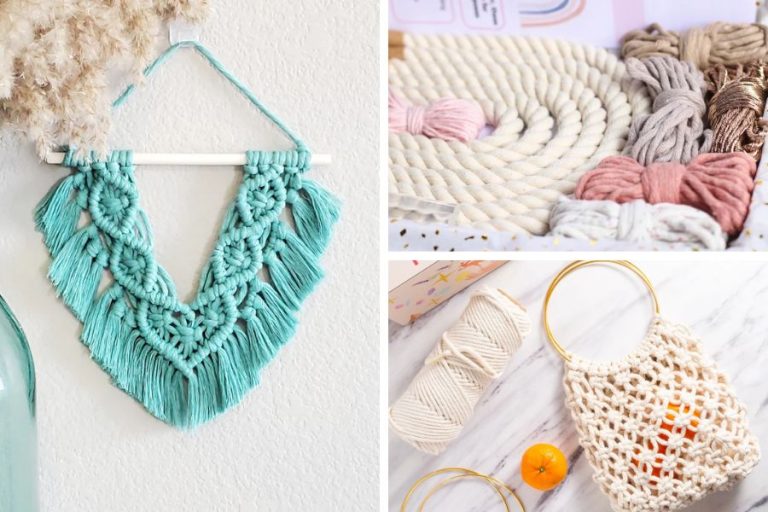
How to Make a Boho Macrame Wall Hanging – Written Pattern by Christina Hodges from the Knotting Millennial
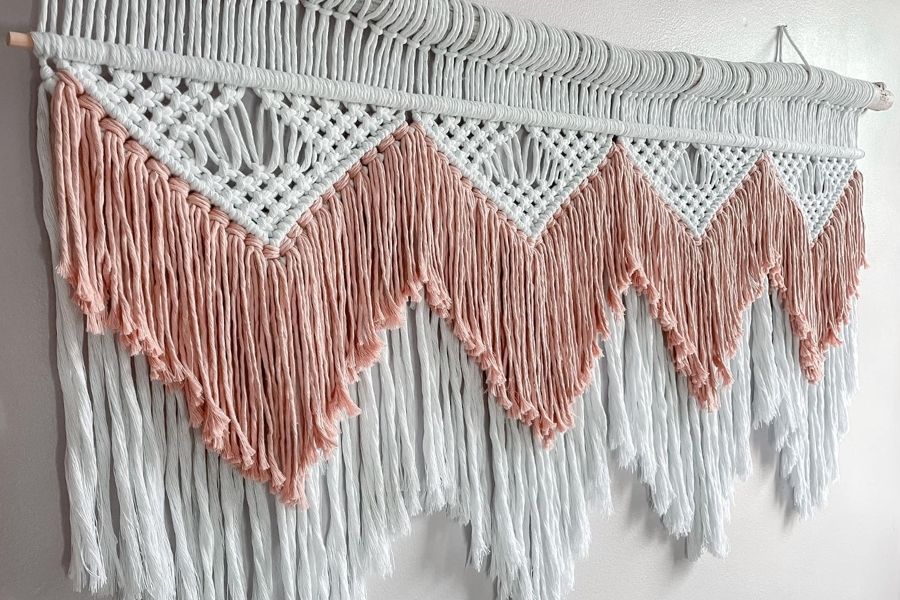
Do you want to learn how to make this beautiful boho Macrame wall hanging? Then you’ll love this free detailed written pattern by Christina Hodges from the Knotting Millenial.
Affiliate links may be sprinkled throughout the awesome, free content below. I’ll receive a small commission when you purchase from my (Amazon) links (at no extra cost to you), which I’ll happily spend on more colorful macrame cords!
Boho Macrame Wall Hanging
Recently one of our members shared a beautiful boho Macrame wall hanging in our Macrame for Beginners Facebook Group.
Luckily, maker Christina Hodges from the Knotting Millennial was kind enough to write out detailed instructions for us in this amazing free pattern.
Follow the Knotting Millennial on Instagram for more pretty projects and make sure to check out Christina’s website if you want to support her work!
Dimensions (approximately):
Width: 4″ (including dowel)
Length: 2″
Materials:
- Main color: 850ft (284 yds) single strand cotton cord, 4mm
- Secondary color: 504ft (168 yds) single strand cotton cord, 3mm
- Main branch 2” thick ~ 4ft
- Secondary dowel ¼” ~ 3.5ft long
- Scissors
- Level
- Tape
- Brush/comb
*my main-colored cord was purchased from Ganxxet and the secondary-colored cord was
purchased through RopeMate on Etsy.
Types of knots used
This pattern consists of lark’s head knots, square knots, double half hitch (DHH) knots and Rya
knots. Video tutorials are listed throughout the pattern in case you need some help with them.
Square knots: each of these knots utilize 4 cords. In the pattern each square knot is written as a
group.
Ex: Square knot 3-6 means that cord 3, 4, 5 and 6 are used for that knot.
*Cords are renumbered after each row*
Preparation
Main cord color:
- Cut 85 cords, each 10ft long. Make sure to tape the ends to prevent them from
unraveling. - Fold each cord in half and attach them to the main branch/dowel using a larks head knot (tutorial for larks head knot)
Secondary cord color:
- Cut 252 cords, each 2 ft long. Make sure to tape the ends to prevent them from
unraveling. - Lay these to the side as they will be used towards the end of the pattern.
Let’s start knotting
- Use two pieces of scrap cord to hold the ¼” dowel about 1-2” below the main dowel.
Make sure that it is hanging level to get the straightest line possible. - Attach all 170 hanging cords to the ¼” dowel using double half hitch knots (tutorial for double half hitch knot)
- Separate the cords into 4 sections. Use masking tape or a scrap piece of cord to “tie” them
together and keep them separated.
Section 1: 43 cords
Section 2: 42 cords
Section 3: 42 cords
Section 4: 43 cords
Now we will work in sections!
Section 1:
- Skip cord 1 & 2 and begin making square knots (tutorial for square knots).
o Row 1: 3-6, 7-10, 11-14, 15-18, 19-22, 23-26, 27-30, 31-34, 35-38
o Row 2: 5-8, 9-12, 13-16, 17-20, SKIP 21-24, 25-28, 29-32, 33-36, 37-40
o Row 3: 7-10, 11-14, 15-18, SKIP 19-26, 27-30, 31-34, 35-38
o Row 4: 9-12, 13-16, SKIP 17-28, 29-32, 33-36
o Row 5: 11-14, SKIP 15-30, 31-34
o Row 6: 13-16, 17-20, 21-24, 25-28, 29-32
o Row 7: 15-18, 19-22, 23-26, 27-30
o Row 8: 17-20, 21-24, 25-28
o Row 9: 19-22, 23-26
o Row 10: 22-26 - Using cord #2 as the anchor cord, begin DHH knots to form the perimeter of the left side
of the triangle. Make DHH knots using cords #3-22 moving in a right downward
direction. - Using cord #43 as the anchor cord, form the perimeter of the right side of the triangle.
Make DHH knots using cords #42-23 moving in a left downward direction. - Connect the two sides of the triangle with DHH knots using the anchor cord from the left
side to form a DHH knot on the right-side anchor cord.
Section 2:
- Skip cord 1 and begin making square knots.
o Row 1: 2-5, 6-9, 10-13, 14-17, 18-21, 22-25, 26-29, 30-33, 34-37, 38-41
o Row 2: 4-7, 8-11, 12-15, 16-19, SKIP 20-23, 24-27, 28-31, 32-35, 36-39
o Row 3: 6-9, 10-13, 14-17, SKIP 18-25, 26-29, 30-33, 34-37
o Row 4: 8-11, 12-15, SKIP 16-27, 28-31, 32-35
o Row 5: 10-13, SKIP 14-29, 30-33
o Row 6: 12-15, 16-19, 20-23, 24-27, 28-31
o Row 7: 14-17, 18-21, 22-25, 26-29
o Row 8: 16-19, 20-23, 24-27
o Row9: 18-21, 22-25
o Row 10: 20-23 - Using cord #1 as the anchor cord, begin DHH knots to form the perimeter of the left side
of the triangle. Make DHH knots using cords #2-21 moving in a right downward
direction. - Using cord #42 as the anchor cord, begin DHH knots to form the perimeter of the right
side of the triangle. Make DHH knots using cords #41-22 moving in a left downward
direction. - Connect the two sides of the triangle with DHH knots using the anchor cord from the left
side to form a DHH knot on the right-side anchor cord.
Section 3: same as section 2
Section 4:
- Skip cord 1 and begin making square knots.
o Row 1: 2-5, 6-9, 10-13, 14-17, 18-21, 22-25, 26-29, 30-33, 34-37, 38-41
o Row 2: 4-7, 8-11, 12-15, 16-19, SKIP 20-23, 24-27, 28-31, 32-35, 36-39
o Row 3: 6-9, 10-13, 14-17, SKIP 18-25, 26-29, 30-33, 34-37
o Row 4: 8-11, 12-15, SKIP 16-27, 28-31, 32-35
o Row 5: 10-13, SKIP 14-29, 30-33
o Row 6: 12-15, 16-19, 20-23, 24-27, 28-31
o Row 7: 14-17, 18-21, 22-25, 26-29
o Row 8: 16-19, 20-23, 24-27
o Row 9: 18-21, 22-25
o Row 10: 20-23 - Using cord #1 as the anchor cord, begin DHH knots to form the perimeter of the left side
of the triangle. Make DHH knots using cords #2-21 moving in a right downward
direction. - Using cord #42 as the anchor cord, begin DHH knots to form the perimeter of the right
side of the triangle. Make DHH knots using cords #41-22 moving in a left downward
direction. - Connect the two sides of the triangle with DHH knots using the anchor cord from the left
side to form a DHH knot on the right-side anchor cord.
Section 1:
- Using cord #1 as the anchor cord, begin DHH knots about 1/8” below the previous row of
knots. Make DHH knots in a right downward direction until the point of the triangle. - Using cord #1 from section 2 as the anchor cord, begin DHH knots about 1/8” below the
previous row of knots. Make DHH knots in a left downward direction until the point of
the triangle. - Connect the two sides with DHH knots using the anchor cord from the left side to form a
DHH knot on the right-side anchor cord.
Section 2:
- Using cord #43 from section 1 as the anchor cord, begin DHH knots about 1/8” below the
previous row of knots. Make DHH knots in a right downward direction until the point of
the triangle. - Using cord #1 from section 3 as the anchor cord, begin DHH knots about 1/8” below the
previous row of knots. Make DHH knots moving in a left downward direction until the
point of the triangle. - Connect the two sides with DHH knots using the anchor cord from the left side to form a
DHH knot on the right-side anchor cord.
Section 3:
- Using cord #42 from section 3 as the anchor cord, begin DHH knots about 1/8” below the
previous row of knots. Make DHH knots in a right downward direction until the point of
the triangle. - Using cord #1 from section 4 as the anchor cord, begin DHH knots about 1/8” below the
previous row of knots. Make DHH knots moving in a left downward direction until the
point of the triangle. - Connect the two sides with DHH knots using the anchor cord from the left side to form a
DHH knot on the right-side anchor cord.
Section 4:
- Using cord #42 from section 3 as the anchor cord, begin DHH knots about 1/8” below the
previous row of knots. Make DHH knots in a right downward direction until the point of
the triangle. - Using cord #43 from section 4 as the anchor cord, begin DHH knots about 1/8” below the
previous row of knots. Make DHH knots moving in a left downward direction until the
point of the triangle. - Connect the two sides with DHH knots using the anchor cord from the left side to form a
DHH knot on the right-side anchor cord.
Rya Knots
*We will be using 3 of the 2ft cords for each knot.
- Start at the tip of each triangle and add the rya knots (tutorial for rya knots) in between the two rows of double
half hitch knots. Going into the two outside holes and then back through the middle hole
to complete the knot. - Make sure all the cords are laying even on top of each other and not bunched up for a
“cleaner” look. - Add the rya knots up/down the entire perimeter of the triangles. There should be 21 rya
knots per section.
Cutting your cords
Trim the cords to your desired length. The rya knots will form a general zig-zag guide to follow
for cutting.
For my final piece, the lowest point of the main-colored cord was ~2ft from the top dowel.
I kept the lowest point of the colored cord ~6” above the main cords.
Brushing & fringe
I brushed out all the main cords on my piece and used a flat iron to remove any of the wave from
the cord.
On the fringe, just brush out the bottom ends, about ¼” from the bottom, for more of a textured
look.
That’s a wrap!
We hope you enjoyed creating this piece and we would love to see your wall hangings shared on social media or in our Macrame for Beginners Facebook Group!
Follow and Tag Christina on Instagram @KnottingMillennial
Handcrafted with love,
Christina